Friday, April 12, 2013

free field trip: centennial farm.

today i took alice to centennial farm for the first time. if youve never heard of it, its basically a miniature farm thats connected to the orange county fairgrounds, that has all kinds of animals and crops and things for kids to learn about farming and agriculture. its awesome. also, its free. with free parking (unless theres something special going on at the fairgrounds).

 its all the way out in costa mesa (about 45 minutes from us), so its not something we can just go do all the time, but today we got to go with a bunch of families from church, including my mom and sisters. this was especially nice since alice had a really rough morning (including a twenty minute tantrum because i wouldnt let her change her own diaper), and i really needed the help. 

alice LOVES animals, so she was really excited to get to hug an ox:


a couple times a day they have a cow milking demonstration but alice didnt really care so she talked to a llama:


and looked at some cows and pigs and goats and chickens and all kinds of farm animals. 


 this weekend was also the youth expo, so there were lots of other free things to do, like crafts:

(this was actually the first of several crafts she did today, apparently alice REALLY likes crafts)

alices very favorite part though was this small petting zoo at the youth expo where she got to feed some of the nicest, friendliest sheep and goats ive ever seen


and the worlds cutest tiniest cow! seriously, that cow is roughly the size of a large dog. this was actually the only part of the day that wasnt free, but it was only a dollar, and it was the only part of the day we payed for (we brought a picnic lunch), so i couldnt resist indulging her. 


i dont know if they were part of the farm or the youth expo, but there was a big exhibition of different chickens and rabbits, where we got to hold the cutest, softest, nicest rabbit ive ever met (and this is saying something because i kind of hate rabbits).


and the very best part of the day? alice had SO much fun, she slept the whole way home! probably the longest nap shes taken all week. 


Tuesday, April 9, 2013

framed embroidery tutorial, part two.

when we last left off, we had just finished step 8, and were all finished with the embroidery part, so now its time to move on to the framing part (click here for part one). for further reference we ended with this:


step 9: gently iron out any creases, the best way to do this is on the "medium" or "wool" setting, and with your fabric sandwiched between two towels to avoid damaging your hard work. now you can set that piece aside for a while because for the next few steps were going to be working making a backing for the frame. 

step 10: on a piece of stiff, non-corrogated cardboard (a cereal box is perfect), trace the INSIDE of the inner piece of your hoop, 


and cut it out, just inside of the circle you just traced (i didnt measure but it needs to be something like a millimeter smaller than the inside of the smaller hoop piece). so now you have a circle of cardboard that rests comfortable inside the back of your embroidery hoop, like this:


step 11: now trace this cardboard circle onto your batting, and cut out TWO circles of batting.


step 12: lastly, trace a circle onto your leftover embroidery fabric that has about a one-inch margin around your cardboard and batting circles. 


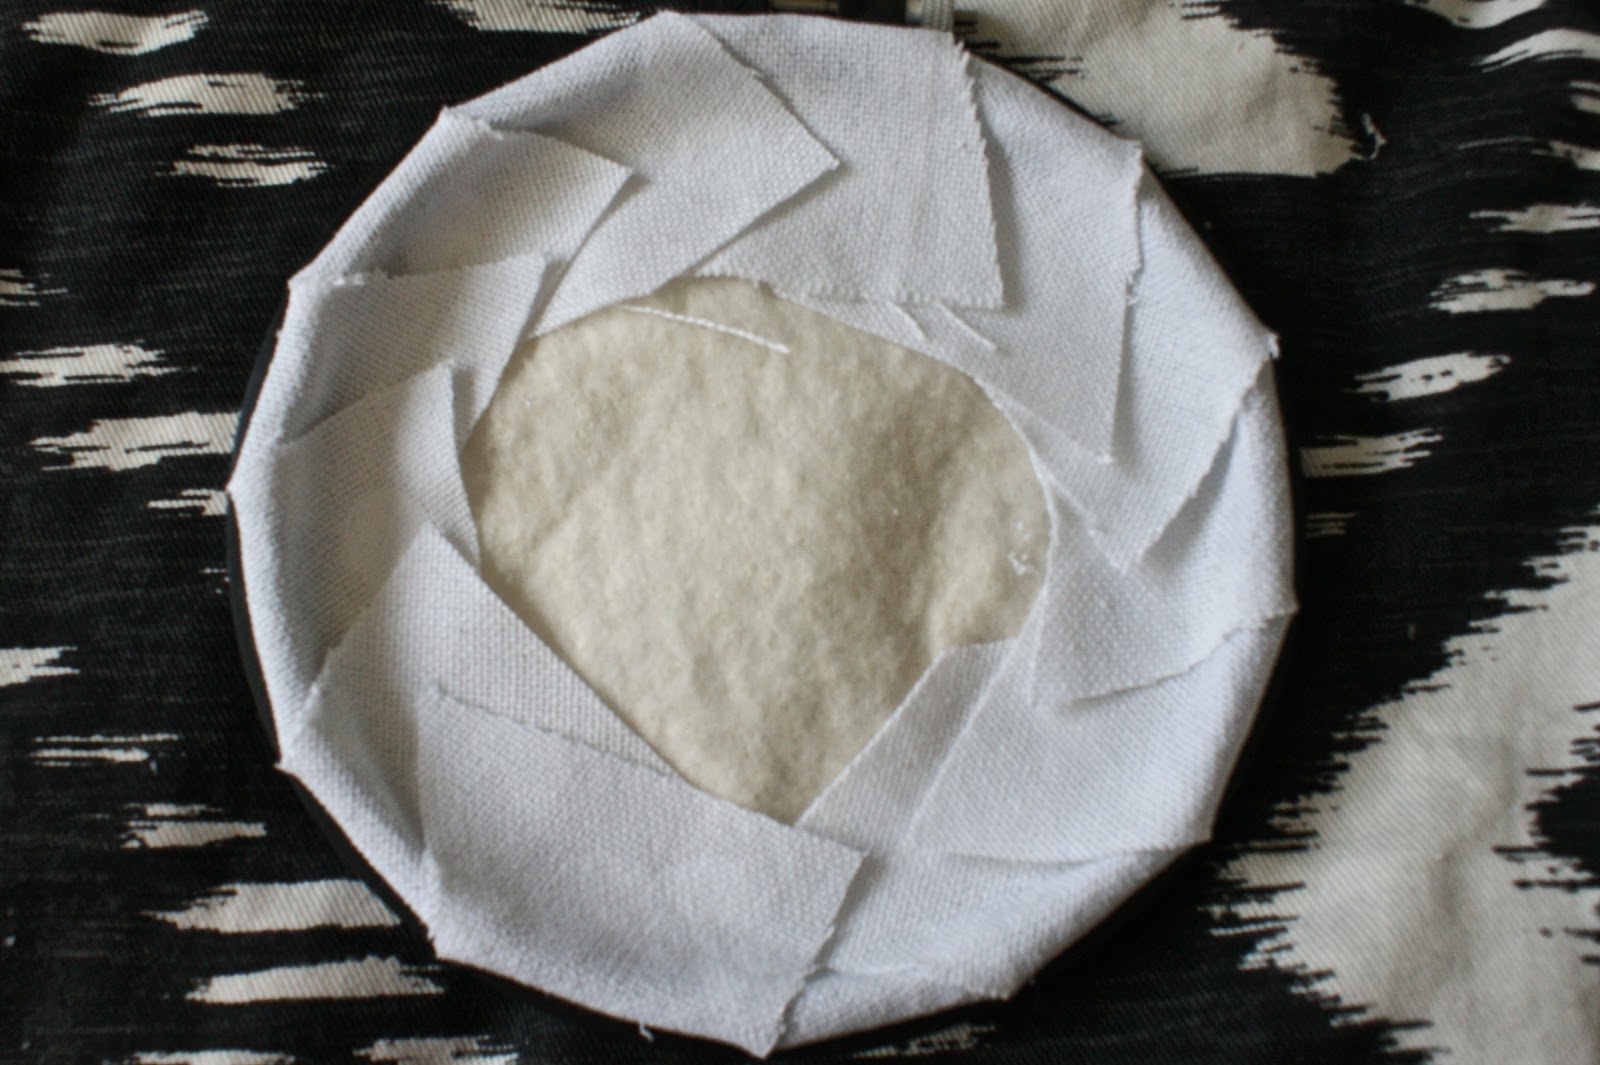
step 12: place ONE batting circle in the center of the embroidery fabric circle, and top with the cardboard circle, like this:


step 13: make small cuts in the margin of the embroidery fabric towards the cardboard circle, spaced about an inch apart (in retrospect, making more "slices" would have made a nicer edge). one by one, fold each "slice" toward the middle and secure with tacky glue (a glue gun would probably work better but i dont have one), like this:


and repeat...


until you have a nice little fabric-wrapped cardboard circle, like this:


step 14: now were going to return to our embroidered piece, and re-frame it in the hoop, this time making sure it is absolutely perfectly straight and centered. if needed, trim your fabric, leaving about a two inch margin. 


step 15: take your second batting circle and put it in the back of your hoop. this helps the front of the finished piece to have the "puffy" look one usually sees in this type of embroidery


step 16: "slice" the margins of the fabric, just like you did with the back piece, trimming if you need to (i left my margin way too big so i had to trim all of them)


 and fold them over the edge of the hoop and onto the batting, doing your best to keep the hoop edge as flat and smooth as possible. 


step 17: once the glue is dry, pop the wrapped cardboard into the back of the hoop, fabric side up. this hides the yucky back part and makes it look "finished".


and now youre done! 

the only thing left to do is hang it on the wall, or in my case, wrap it up and give it as a gift. (one of these days i promise im going to make one for us, i just can never get around to doing it). 


so there you have it, my very first ever craft tutorial. maybe someday ill do more? well have to see about that. 

Monday, April 8, 2013

framed embroidery tutorial, part one.


some friends of ours got married (named jenny and nathan, if that wasnt obvious already) last weekend, and i made this little framed embroidery piece for their gift, and i thought id share how to do it sinc its a holy trifecta of simple, inexpensive, and handmade without looking, you know handmade. this is kind of a long project (it took me two afternoons, a couple hours each), so im breaking up the project into two parts, first the embroidery part, then the framing, since thats how i broke it up when i made it, embroidery the first day and framing the second. 


heres what youll need:
(note: if youre the crafty type, you probably already have most of this, the only part i had to go out and buy for this was the hoop, but even if you had to buy every single thing it should run less than $20)
a six-inch embroidery hoop (joanns just got these really fancy black ones for $2.50)
evenweave embroidery fabric (about $6 for a package that will make 3 six inch framed pieces according to these directions)
embroidery floss in the colors of your choice
embroidery needles
disappearing marker
tacky glue
thin batting (i had leftovers from a blanket i made years ago, you only need a tiny bit)
thread snips
thin cardboard (not pictured, like from a cereal box or something) 
iron, ironing board, and towels (also not pictured)

and heres how you do it: 

step 1: start by tracing the inside of your hoop and sketching out your design. adding crosshairs will help with composition and symmetry. its ok if its not exactly perfect because theres LOTS of opportunity to refine it as you go. 


step 2: once youre happy with your design, stretch your fabric into the hoop, making sure the grain of the fabric is straight, and copy your design (and crosshairs if necessary) onto the fabric with your disappearing marker


step 3: cut a length of floss and begin to stitch over your design using a backstitch (or whatever stitch you choose), leaving a small tail of floss on the wrong side of your hoop and MAKING SURE NOT TO EVER KNOT YOUR FLOSS. if you make any knots theyll be super obvious when you frame it, so you need to be careful. 


 step 4: keep going...

and going...

until youve finished your first shape, like so:


step 5: trim your floss leaving a small tail, just like in the beginning. the back of your piece should be very neat and look almost the same as the front. 


repeat steps 4 and 5 with the rest of your piece, one section at a time, refining your design as you go...


starting a new piece of floss for each separate section, DONT use the same piece of floss to do two separate shapes, the little connecting piece WILL show when its all done. (note: you need to use VERY small stitches along curves)


keep going until youve embroidered your whole design, like so:


 step 6: when youre all done youll have a whole bunch of little tails hanging off the back like this:


so youre going to trim them close to the fabric (but not TOO close, about 1/8 of an inch will do) and secure with a dot of tacky glue, like this:

and give it a half hour or so to dry


step 7: remove the fabric from the frame and gently rinse the disappearing marker from the fabric with cold water, so the color from the floss doesnt bleed. be careful not to agitate the fabric either, since that could pull out some of your embroidery. 


step 8: let fabric air dry and take a much deserved break, and stay tuned for part two!