Showing posts with label decorating. Show all posts

Wednesday, July 29, 2015

our bedroom makeover part 4: benedicts newborn nursery


funny story: i wasnt planning on having a newborn/transitional nursery at all. i had found the most perfect crib that would fit in our little "baby corner" just right AND last until benedict was big enough for a real bed so that there would be an absolute minimum of furniture buying/moving. it was a most expertly crafted plan and well, you know what they say about plans...

this perfect crib? apparently its like, the most popular hardest to get crib in the entire world. once we had the room ready/the money to finally order it (at approximately 36 weeks pregnant because i am really on top of things...), it was out of stock everywhere. it was so out of stock that most of the places that carry it (target, amazon, buy buy baby, the manufacturer, AND a variety of independent furniture stores) wouldnt even let me order one. but bed bath and beyond would. obviously i spent an entire morning crying and panicking about this, because 36 weeks pregnant. 

then miraculously bed bath and beyond let me order one. then a couple days later tragedy struck once again when they emailed me that the crib was, in fact, on backorder and would not be shipping until the end of august. which was about 6 weeks after my due date. so i had to figure out something else fast (actually, faster than fast because benedict decided he was coming quite a bit early). 

thankfully, this was our second baby and we knew all about how babies really dont need very much at the beginning. also, even though the bedding was 100% diy, i already had all the materials on hand and baby bedding is super fast and easy to make. also also, we conveniently still had the vintage bassinet that we used when alice was a baby. so really this whole crib situation was just overblown by my exceedingly pregnant emotions. 

since there wasnt a nursery in our room to begin with, i dont have a "before" picture, but i do have some (for some reason really oddly lit?) photos of benedicts little corner of our home:


now while the previous parts of our bedroom makeover have involved some rather large and expensive trips to ikea, benedicts nursery was practically free. and by that i mean, i spent about $16 on some striped fabric (which ive hardly put a dent in since i havent made the actual crib sheets yet) and the rest was pulled together from things we already had. and, i know im biased, but this is the cutest nursery that i have ever seen. 

heres where benedict sleeps: 


the bassinet is vintage, i bought it at an estate sale when i was pregnant with alice for the stupidly low price of $2 (just fyi, prescott, arizona is a VERY popular place for rich people to go to retire so the antiques/estate sales are AMAZING and SO cheap because nobody there wants old stuff). it was blue when i bought it but we had conveniently already painted it black for alices nursery. the blanket was made by chopping the least-raggedy portion from a gorgeous (but well-worn) chenille bedspread that i bought at jet rag dollar day when i was like 19 (that i had been stowing away for YEARS because it was too pretty to throw away but too damaged to use in its entirety) and sewing it into a miniature quilt. the sheets and nursing pillow i made with the aforementioned striped fabric that i got at the local salvage fabric store for $4 a yard (p.s. the nursing pillow pattern is from this book and i will have a tutorial for no-elastic bassinet sheets up here very soon!). 

and here is benedicts little changing area (which you already saw in the post about the dressers but i want to go over the details anyway): 

the pennant bunting was re-purposed from my baby shower decorations (should i post a tutorial for this one too?), and i covered a $2 changing pad from a local resale group on facebook in the same striped fabric i used for the sheets and nursing pillow (tutorial pending for this project as well). all of benedicts clothes and supplies are in the top two drawers of the dresser (except for diapers because for now we still have a mountain of diapers but i know that will soon be a thing of the past), but i put all the little tiny bits (pacifiers, nail clippers, nursing pads, etc) in a vintage card catalog drawer (from the same estate sale as the bassinet, i think it was also $2, maybe $5), and i accessorized with some prints that love but previously didnt have a home for (the two on the left are by leslie sam kim, and the TARDIS print is by nan lawson), and a sonogram of benedict because i found an empty frame and it was just the right size. 

even though decorating is hard for me AND we have to wait for the crib (im really dreading moving everything around AGAIN when it comes...), i really do love how everything came together, and how we were able to re-purpose so many things we already had to make an adorable nursery for benedict. 
stay tuned for the final nursery update in a couple months!
post signature

Wednesday, July 8, 2015

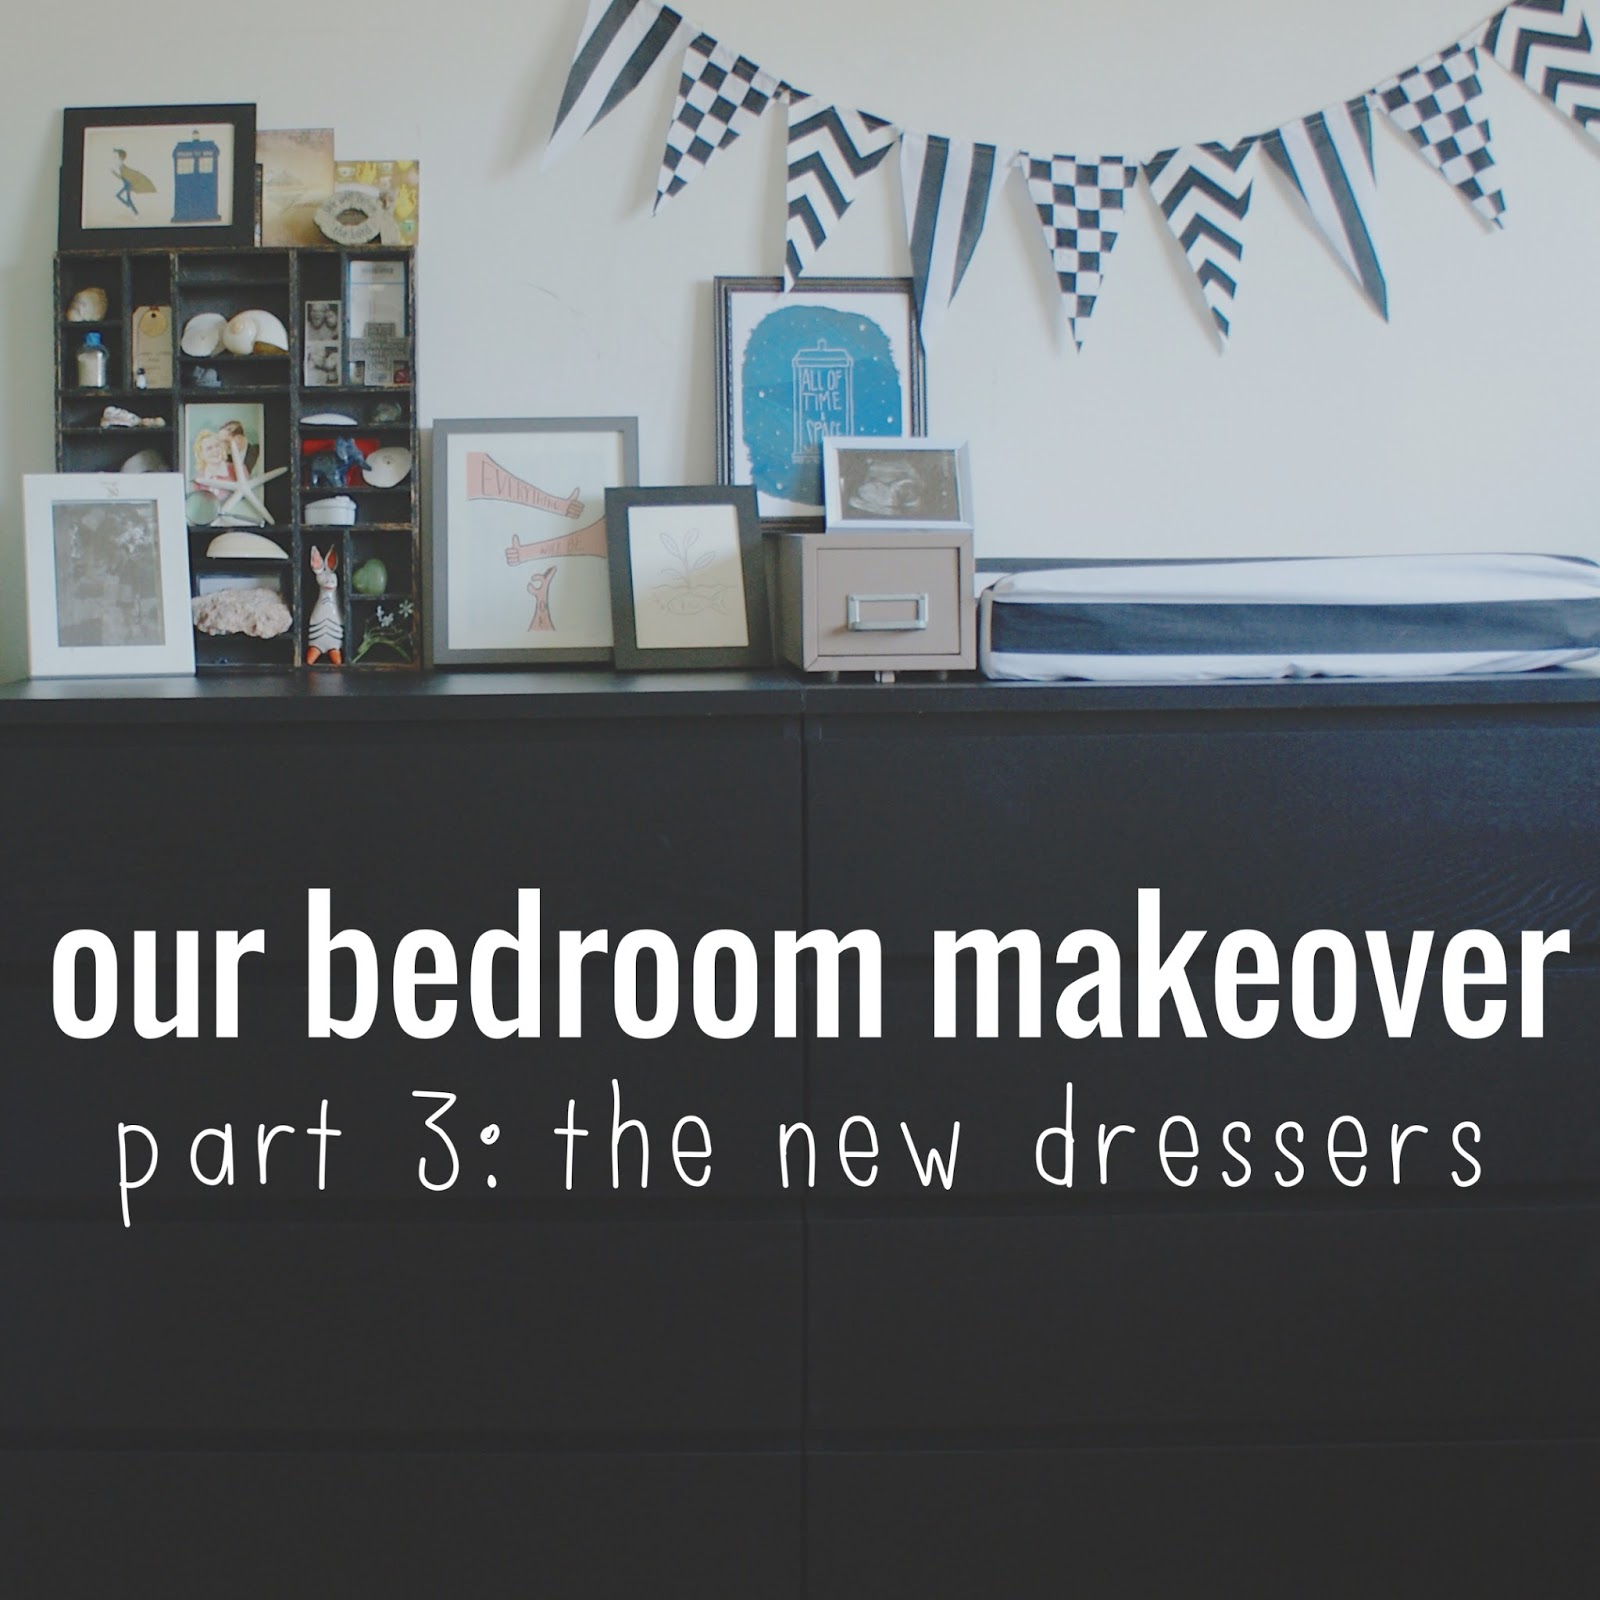
our bedroom makeover part 3: the new dressers.


in case youre a new reader/missed it/forgot i was doing this series because its been so long since ive mentioned it: were in the middle of our first big home improvement project here at the meyers house: a complete bedroom makeover. if youd like to catch up, you can see our "before" pictures and read about our goals/plans in part one and check out our awesome new bed (which i am still absolutely in love with) in part two. but enough about that, its time to move on to part three: the new dressers. 

now, if you read the the post about the bed, you might remember how at the end of that project i was all "that was surprisingly easy! everything is going great! i love redecorating!". and well... that should have served as a warning for how things were going to start going once we got to the dressers. 

see, it was mid-late april when we finished up everything with the bed, and after giving ourselves (ok mostly just me) a little time to recover/get things put back together, we figured that we could get the dressers all done by the end of may (we knew they would take a bit longer since we had to sell/get rid of the old ones) and the nursery done at some point in june and everything would be all set long before it was time before baby arrives. ha. ha, ha, HA. 

heres how things actually happened: may turned out to be a crazy month with james working out of town, me having finals, james having school week, and then james working out of town some more (actually, into the first couple weeks of june), so i didnt have much help with the remaining de-cluttering we had left. which, of course, had gotten down to just jamess stuff so i couldnt do it by myself anyway. at the same time, we learned that it is surprisingly difficult to get rid of an old bedroom set. i tried for weeks to sell it as a set because that was easiest for me, but nobody wanted the whole set. so then i listed the pieces individually, and heres where things get weird: the totally trashed nightstand? that goes immediately for almost the entire asking price no problem. the dressers we eventually sold to a family who offered to take both at a slightly lower price. the mirror, the nicest, least dated, most practical piece of the whole set? crickets. (dont worry we did eventually find it a home). 

also, because things got delayed for so long, ikea apparently discontinued the dressers we had planned on buying. BUT (finally some good news here) we did pick an alternative we were happy with, AND by time the old dressers were out and we could go buy the new ones, they were on sale. 

getting everything set up and put back together ended up taking for. freaking. ever. (ok like a week) because of course james got sent out of town (then to a far-away job that made him come home really late) RIGHT when we got the new dressers home, but eventually we got everything taken care of, even if it was like, a whole month behind my original schedule. 

so how do things look now? pretty dang great if you ask me, heres the before: 


and heres the after: 


now, obviously everythings a lot tidier and more attractive and thats great and all, but heres the really mind-blowingly amazing part: EVERYTHING that was in those two huge dressers that took up the whole wall (plus all of the babys things) comfortable fit into the two dressers that take up just slightly more space than jamess dresser alone. well, actually, the footprint of the new dressers is only slightly wider than jamess old dresser, theyre actually shallower (but taller) and i have even more floor space for pattern making and fabric cutting.

one concern i did have about moving our dresser situation into something more compact was that we were going to lose a fair amount of surface area (especially considering that one of the dressers would also be babys changing table area), but that turned out to not be a problem at all since 1. the dressers were kind of just collecting clutter/messes that really belonged elsewhere, 2. my new nightstand has three drawers and actually gave a bunch of things an actual home, and 3. there was totally a bunch of junk up there that needed getting rid of (but since it was out of the way, we never bothered). 

anyway, i love the new arrangement. i love how clean and sleek and not hideous the new dressers are, how all our things take up WAY less space, and especially how i finally, for the first time ever in my entire life (that i can remember) have a little tiny part of my home that looks absolutely just the way i want it to: 


maybe this seems really silly and dramatic, but decorating doesnt come naturally to me, and over the years ive really struggled to find my personal style when it comes to homemaking, and trying to reconcile that with the fact that i hated most of the things we owned and we didnt have money to replace them made things really difficult. paralyzingly difficult. like, ive never actually felt at home anywhere weve lived up until now because so little of what we had was something i liked or chose, it was all just there. 

but now, i do know what i like: i like things mostly plain and neutral with some small personal touches. i like things to be functional and i do not like having every single available space occupied. i like empty wall space but i also like having a few special pieces of art on display. and i really, really like the way things are going in our home so far. 


post signature

Friday, May 22, 2015

our bedroom makeover part 2: the new bed.


so far our bedroom makeover is sailing right along. i mentioned earlier that we were starting with the new bed and mattress because that was our most pressing need, and im really glad we did. because not only do we now finally have a functional bed that doesnt have us waking up feeling like weve been hit by a bus, but the dramatic transformation has helped to further motivate our efforts in de-cluttering/making a nice, grown up house finally. 

also, i just have to stop here and pat myself on the back and say that the makeover has gone exceptionally well aesthetically, as well as financially. 

see, ive always shied away from even the most benign of home improvements because it usually goes something like this: i want to make this new super simple clothes rack for craft fairs but it turns out that the dowels required are actually $13 EACH and the cheapest drill that will drill through wood dowels is $100 and it doesnt come with drill bits, or i finally get some nice art for the living room and go to joanns for frames and WHY OH WHY IN THE NAME OF ALL THAT IS GOOD AND HOLY IS THREE PICTURE FRAMES $60 AFTER SALES AND COUPONS?!?!?!?!

but this project has been basically the opposite. we originally wanted to get this bed and a mattress but we didnt know which one and also sheets and i was like "oh crap well hopefully we can get this all done for about $1000 but you know how things go with house projects so goodbye savings account". then we actually went to ikea and my favorite mattress was actually the very cheapest of all the foam mattresses. then after several weeks of none of the local ikeas getting THAT particular bed frame in stock we decided that rather than paying the extra $100 to order one online, wed just get this (nearly identical) bed frame which we thought would be $100 cheaper than our original choice. well, since the layout of our room makes only one side of the bed accessible for drawers and the drawers are actually sold separately, we were able to get the whole project, including splurging on a mattress pad and a spare set of sheets (after years and years of having a king sized bed and not being able to afford a spare set of sheets, this was a big deal, ok?) for $300 less than my original (low-end) estimate. 

so how are things turning out so far? well, heres the before: 


and heres the after: 


now, aside from the obvious NO MORE GROSS HIDEOUS VISIBLE BOX SPRINGS, theres also the not-obvious multiple empty shelves in the linen closet because we now have functional under the bed storage. also, theres now a totally decently sized area of empty floor available for things like exercising, sorting laundry, and cutting fabric. we still have some smaller things to deal with in this area of the room though, like wrangling the probably-dangerous extension cord/power strip situation caused by the old bed blocking the most accessible outlet (now made totally useable by the new bed), finding a new place for my full-length mirror (actually i have an idea for that), and doing something about our pillow situation (though really that should wait until were done with me being pregnant/having a new baby). 

but all in all, im definitely stoked on our progress so far, and i cant wait to get on to the next phase, new dressers!


Wednesday, April 29, 2015

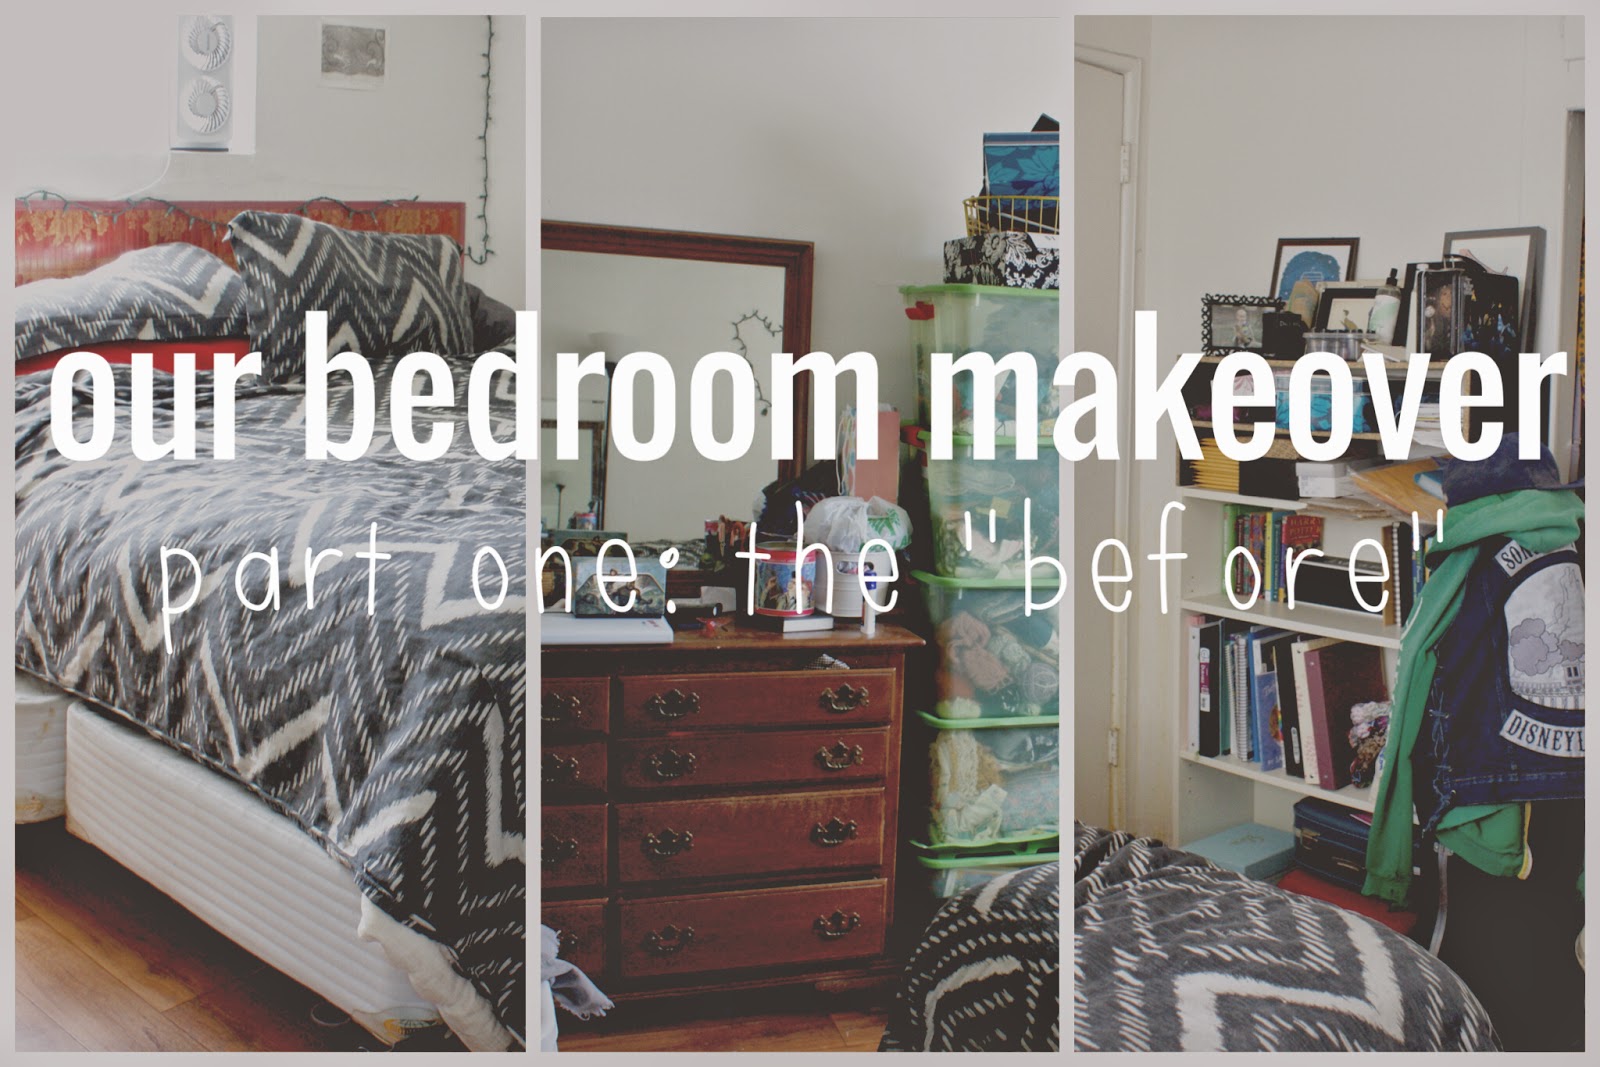
our bedroom makeover. part one: the "before"


ok, so this post is totally new, uncharted territory for me. not only is this whole buying/changing furniture business something totally stressful and scary (especially since were making BIG changes), i also have never really felt all that comfortable sharing pictures of the inside of our apartment. you know, because it was always so cluttered and ugly and embarrassing. but now as we make our way through this journey to a sleek, minimal household, I'm feeling a lot more comfortable not only changing it, but also documenting and sharing those changes. i told you that this minimalism business has been life changing. 

while things in general are shifting all over the house (things getting cleaned out, moved, replaced, sold), those changes have all been on a smaller scale (typically only one small thing at a time). but our bedroom... well, over the next few months (i really, really hope we can get everything done before the baby comes in july...), its getting a complete overhaul. and honestly, it really needs it. see, with the exception of our bedding, clothes, and personal affects, there is not one. single. thing. in our bedroom that we picked or even actually like. most of it is hand-me-downs from jamess family, and im pretty sure everything else weve pulled out of the trash. im not joking. 

so here are a few "before" shots (which i kind of hesitate to call an actual "before" because weve already purged so much junk that it looks like a completely different room). while we are mostly done with our big house purge, we still havent gotten to jamess side of the closet/his dresser area, largely because previously they had been physically blocked by other piles of crap. i cant believe i just admitted that on the internet. 


now before we get into actually changing things, lets take a minute to go over the problems that need addressed here and what our goals are: 

1. the bed. i hate this bed. its a king-sized pillow top mattress that jamess mom had in storage for who knows how long before giving it to us... almost five years ago. i guess its nice if you like absurdly soft, completely unsupportive mattresses that are so tall your feet dont touch the floor when you sit on them, paying literally $100 on sheets and not having any usable floor space in your entire bedroom. unfortunately, i do not like any of those things. also take note that its just on a basic wire frame with the hideous box springs totally exposed. ive wanted a cute bed frame and a smaller, firmer mattress for years, so, a new bed and mattress are the #1 priority. 

2. the dressers. objectively, i cant really say anything bad about these dressers. theyre super solid actual wood and theyre a matching set and im sure they were very expensive new. but like the mattress they were in storage for years and not looking so hot. also, theyre totally not our style, which was something i was totally willing to overlook until i realized just how HUGE they are for how pathetically little they hold. we werent even looking for dressers the last time we went to ikea but we literally found some that could comfortably hold all of our clothes (i feel its worth noting that neither of the existing dressers is full) in about 1/2 the space. im not exaggerating. so after the beds all done, those are up next. 

3. a place to put the new baby. honestly, i wasnt in a rush to get a full blown crib because of how long alice co-slept with us/how long it was before we used ANY of her nursery furniture. BUT once we realized just how much space the new furniture was going to free up, we realized that for just a tad more money than we were going to spend on a bassinette, baby #2 could have its own mini-crib to last it to toddlerhood. unfortunately/fortunately, bedding options for mini-cribs are severely limited, so ill also need to make baby's nursery from scratch (though this is a challenge that i am totally up for/not freaking out about).

as of right now, were still working out the bed situation. but over the next few weeks i promise to keep you updated on our progress! 

Wednesday, October 29, 2014

sometimes, you just have to spoil yourself (sponsored by the bouqs)


do you ever have those days (or weeks, or months, for that matter) where youre just like "you know what, if i can survive this, im gonna send myself a dozen roses"? or is that just me. 

cause im gonna be completely honest, i say this all. the. time. 

but then i survive whatever it was i was going through and forget to send myself those roses. 

but this week. this week is different. i was prepared to spend a couple weeks in a weird limbo trying to get back on my feet after two weeks of birthday chaos. but i was NOT prepared for birthday chaos to end with james working out of town for six days during midterms and then having school week the next week. 

so yeah. birthday chaos (which included a week of alice being very, very sick). immediately followed by six days by myself, which included both midterms and starting a new class at the homeschool co-op. and now im driving to whittier and back twice a day, on top of school and teaching and all the stuff thats normally on my plate. 

(update: james DID find a carpool on monday for the rest of the week)

but thanks to the bouqs, i was able to preemptively send myself those roses. 

and they are truly some amazing roses:


now the bouqs, they are a totally different animal when it comes to ordering flowers: they just sell flowers. beautiful, incredibly fresh flowers (from either a farm in california or the side of an active volcano in south america), at reasonable, up front prices, with no upselling or hidden fees and the easiest ordering process ever. oh, and no ugly vases to feel bad about throwing away after the flowers die. (also, i totally dig their eco-friendly and fair trade practices). 

seriously. once i had set my sights on the hope full bouq, it took a whopping three minutes before i knew EXACTLY when this was going to arrive:


and when it did, i wasted no time getting them into my favorite vintage vase: 


and holy moly i suddenly feel a heck of a lot better about how tired and cranky and stressed out i am right now, because are those not the most ridiculously bright pink roses youve ever seen? and they were so, so fresh. like, not even opened all the way fresh. like, theyve been on the table reminding me everythings ok for a week and only just yesterday started looking sad. 

so yeah, next time i want to treat myself (or someone else) to something nice, i know where im going first: the bouqs

(disclaimer: this post was sponsored by the bouqs and does contain affiliate links. i received a bouq to review, but have expressed my true, honest opinions. i love these flowers, and i hate school week)


The Bouqs - Premium Farm Direct Flowers

Monday, October 27, 2014

easy diy weeping angels.

youre probably aware by now that i had a totally rad dr who themed birthday party last weekend. and whats a dr who party without some (fake, thank GOODNESS) webbing angels hanging around to scare the bejezzus out of everyone? not much of a dr who party ad all, if you ask me...

anyway, fellow whovian party planners may or may not have seen this incredible tutorial using barbies and stone texture spray paint. its amazing. and also, really really time consuming and potentially very expensive if you dont already have all those supplies just lying around. (if you havent seen the tutorial though, go take a look, its not one to be missed). 

now, i am way, way too broke and lazy to deal with that involved of a project. so i came up with my own cheaper, faster, easier, and still freaking terrifying alternative:


heres what you need: 

1. assorted angel tchotchkes (note: these are surprisingly difficult to find seeing as folks tend to collect them and not get rid of them, so be prepared to spend some time looking for them. though i did find what i needed at a fairly large thrift store)

2. krylon natural stone spray paint (available at craft and hardware stores, i made five weeping angels without using up a whole can, so you dont need a lot)

3. paper and tape to mask off a safe area for overspray (very important)

heres what you do:

step 1: pick a nice sunny spot outside and tape down some paper to protect everything around you from overspray (do NOT make my mistake of picking a spot in the shade because you think it will make the project more comfortable, because all it will do is make your angels take for-freaking-ever to dry):


step 2: thoroughly coat your angels with the spray. please note that the stone spray is a lot less like paint and a lot more like stuff with bits in it so make sure to turn your pieces upside down, spray the underside first, THEN turn them over and spray from the top:


step 3: let your angels dry for at least fifteen minutes in the sun (guess how many tries it took me to figure that one out...), before going back to fill in the nooks and crannies. dont worry about the paint getting thick, lumpy or drippy though, it just adds to the effect. 


step 4: let them dry (again IN. THE. SUN.) for a couple more hours until the stone finish fully hardens, and then YOURE DONE!

wasnt that easy? 

im really happy with how these came out, and i got a LOT of compliments about them at the party. mainly im happy that i got to still have my weeping angels for about $15 and an hour, instead of spending who knows how much on an all day project. 

please let me know if you try this out, id love to see what you make!

(p.s. this post was not sponsored in any way by krylon it just so happens that they make the only stone type spray paint i could find) 


Wednesday, October 8, 2014

alices vintage star wars party.


on sunday, alice turned three. so obviously we threw her a party. on saturday. because saturday is a little more convenient and (also obviously) we wanted to spend sunday at disneyland and thats just how we roll. 

so yeah, birthday party. 

this year it was a little tricky to pick a theme, seeing as alice IS old enough to have interests and preferences (as in, now she has tons of friends and likes to play outside so the party HAD to be at a park), but shes NOT old enough to understand the gravity of picking a birthday party theme. wed ask her about all the different things she likes, "do you want a princess party? a my little pony party? an alice in wonderland party? a dr who party? a dinosaur party? a harry potter party?" and the answer was always "yes". 

so james and i agreed on star wars (disclaimer, alice DOES love star wars, and science fiction/fantasy in general), but since star wars is a pretty standard party theme (and i refuse to acknowledge the existence of prequel films), we went with a vintage star wars theme. 

because it was at the park (and we had QUITE an extensive guest list) we kept things simple with just treats and a piñata. i got a plain cake from costco, made pretzel lightsabers (which, by the way, is incredibly difficult without a microwave), and my brother just so happened to have a nice selection of actual vintage star wars toys to use for table decor:


oh, and there was the very, very important, not at all negotiable even though it was way expensive custom death star piñata: 


(sidenote: continuing last years tradition of birthday dress fiascos, i accidentally made alices dress WAY too big and had i had to make serious alterations the morning of the party, but thankfully no one noticed)

honestly since the majority of the kids at the party were preschool age, i was NOT expecting the party to last very long, but a friend brought some pool noodle lightsabers to share, and all the kids spent a good half hour playing contently with them:


 and totally ditching the party to go play on the playground:


but dont worry, everybody came back when we started painting cookies:


cookie painting was my moms idea, i had already bought these (also embarrassingly expensive) cookie cutters for the party: 


and with just a few jars of icing and a pack of paintbrushes, they were instantly transformed from just a snack into a super fun activity that all of the kids LOVED. seriously, my mom knows whats up: if youre having a party with lots of kids, cookie painting will always be a hit (thanks mom!). 

obviously since we had cookies, we were also going to need some milk to go with them. and whats a star wars party without BANTHA MILK!!!!


(pause for the like three people who know what im talking about appreciate what i just said)

after cookies and milk it was time to smash that piñata: 


sing happy birthday:


(btw, alice was SUCH a good sport about pretending to blow out the candles like six times so i could get a nice picture. i like her.)

and opening presents:


overall, this was a MUCH mellower party than last year (even though there WAS a similar jamess work fiasco for the two weeks prior to the party AND it was way too hot), despite the fact that there were about five times as many kids, which was totally awesome. and i dont think any of us could have been happier with how it turned out. 

especially alice, and thats what really matters. 

Thursday, April 17, 2014

how to make a fitted sheet (out of that flat sheet that you werent using anyway)


embarrassing confession time: i am a violently fitful sleeper. to the point where i WEAR GIANT GAPING HOLES in my sheets. im not kidding. i wish i was kidding, because a few months ago, i finally wore out the super fancy sheets we got on clearance right after we got married. and i dont mean that the sheet finally wore out, i mean that there was a distinct, obvious, victoria-sized hole on my side of the bed and the rest of the sheet was perfect.

at the time this happened, we had NO money for new sheets. not even crappy ones, given that our (hand-me-down) mattress is a king sized extra thick pillow top and the cheapest cheap sheets i could find were $40 +.  i knew we couldnt get crappy sheets because one time i had crappy sheets and i wore them to ribbons in like a year. so i started researching options and i found a few tutorials on how to make a fitted sheet. 

and i was like, "great! i totally have the flat sheet that came with our set because theres nothing i hate more than flat sheets and i have a matching one hanging out in the linen closet wasting space so ill use that! problem solved!"

but just about all of these tutorials involved measuring your mattress and doing all this complicated math (i guess its not that complicated, but please remember that im HORRIBLE at math), measuring the dimensions of the mattress and adding various amounts to account for hems, elastic casing, and seam allowances. 

i started taking measurements and trying to work out the math but it got too complicated and i wasnt sure the flat sheet would be big enough and my enthusiasm for making a fitted sheet waned all the way down to "oh well, thats too much work, ill just pull out the ugly flannel sheet that i hate and hope we have enough money for nice sheets when that one eventually wears out". 

then one day a couple weeks ago, it hit me that flat sheets are specifically designed to wrap all the way around the mattress and that OF COURSE it was enough fabric and the only measurement i even needed was the mattress height and i didnt even have to do ANY hems or casings. 

awesome. 

so, i finally made our fitted sheet. and because i know that i am certainly not the only person out there that HATES sleeping with a flat sheet (they make me claustrophobic, ok), i thought that all you kind folks would appreciate this little tutorial, because whats better than getting a free extra fitted sheet in your sheet set?

heres what you need:


flat sheet in the same size as your mattress
measuring tape
rotary mat + clear ruler
marking pen of some kind
scissors or rotary cutter
pins
lots and lots of elastic (enough to go ALL THE WAY around your mattress, my king sized sheet used about 8.5 yards)
sewing maching (not pictured)

and heres what you do:

step one: fold your flat sheet in quarters with all four corners exactly together (this makes it so you only have to cut and measure once):


step two: measure the overall height of your mattress, and add about an inch or so to account for the seam allowances (my mattress was about 13 inches high, so i did 14 inches):


step three: mark a square using that measurement on the corner of your sheet (so, in my case, 14x14 inches):


and cut it out, cutting through all four layers at the same time:


step four: pin each corner together right sides together (and dont mess this up like i did):


this is what makes the "pockets" for your mattress)

step five: sew each corner shut, using a short straight stitch for extra durability:


step six: finish your seam allowances with a zigzag stitch (this is important to prevent fraying, since sheets get washed a lot, you dont want the seams to wear out):


step seven: heres where things get tricky, set your sewing machine to a stretch stitch (like the one thats a zigzag/running stitch combination, and place one end of your elastic under the presser foot like so:


and sew a few stitches back and forth to secure the end. next pull your elastic TIGHT and hold it right up against the edge of the sheet (just like in the picture) sew ALL THE WAY around your sheet, keeping the elastic pulled as tightly as possible. 

it should look like this on the inside:


and this on the outside:


step eight: when you get all the way back to where you started, keep sewing the elastic until it overlaps the beginning by about an inch, and then back stitch a few times to make sure its EXTRA secure:


step nine: clip any threads you have left, and then youre done! go enjoy your brand spanking new custom fitted sheet!

but after telling a few people about this project, i noticed that flat sheets are a pretty polarizing issue. people either love them or hate them. what are your thoughts on flat sheets? necessary, or unpleasant?