when we last left off, we had just finished step 8, and were all finished with the embroidery part, so now its time to move on to the framing part (click here for part one). for further reference we ended with this:

step 9: gently iron out any creases, the best way to do this is on the "medium" or "wool" setting, and with your fabric sandwiched between two towels to avoid damaging your hard work. now you can set that piece aside for a while because for the next few steps were going to be working making a backing for the frame.
step 10: on a piece of stiff, non-corrogated cardboard (a cereal box is perfect), trace the INSIDE of the inner piece of your hoop,

and cut it out, just inside of the circle you just traced (i didnt measure but it needs to be something like a millimeter smaller than the inside of the smaller hoop piece). so now you have a circle of cardboard that rests comfortable inside the back of your embroidery hoop, like this:

step 11: now trace this cardboard circle onto your batting, and cut out TWO circles of batting.

step 12: lastly, trace a circle onto your leftover embroidery fabric that has about a one-inch margin around your cardboard and batting circles.

step 12: place ONE batting circle in the center of the embroidery fabric circle, and top with the cardboard circle, like this:

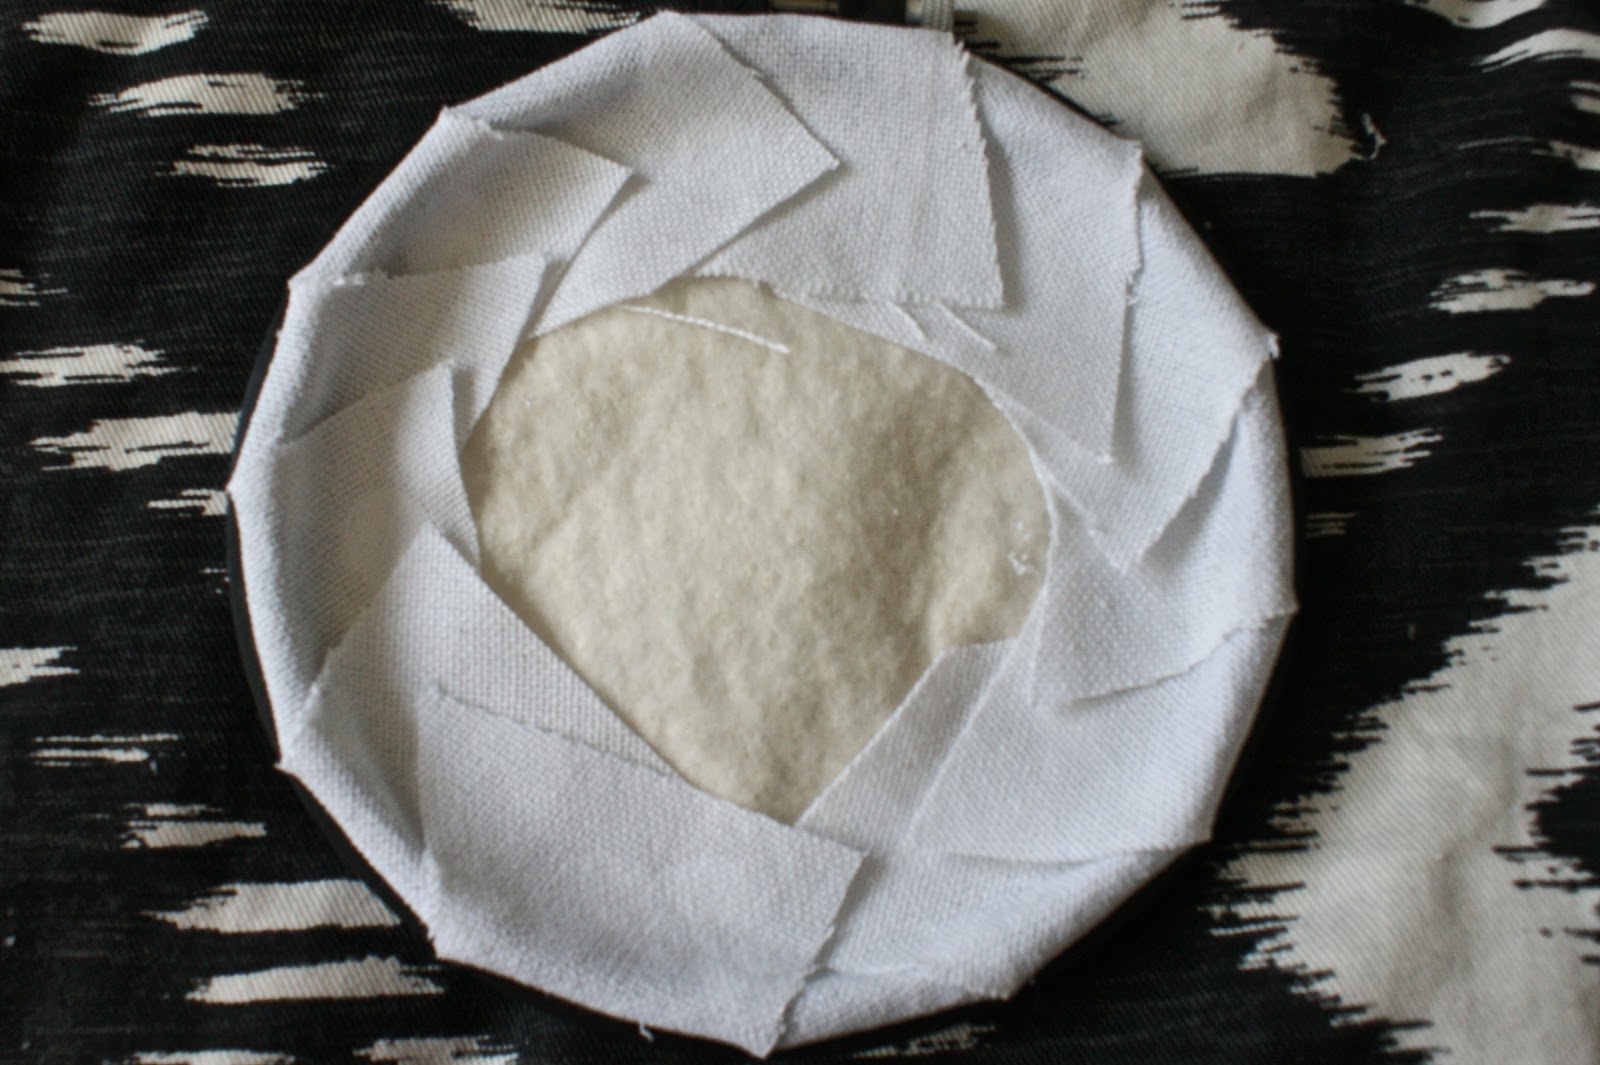
step 13: make small cuts in the margin of the embroidery fabric towards the cardboard circle, spaced about an inch apart (in retrospect, making more "slices" would have made a nicer edge). one by one, fold each "slice" toward the middle and secure with tacky glue (a glue gun would probably work better but i dont have one), like this:

and repeat...

until you have a nice little fabric-wrapped cardboard circle, like this:

step 14: now were going to return to our embroidered piece, and re-frame it in the hoop, this time making sure it is absolutely perfectly straight and centered. if needed, trim your fabric, leaving about a two inch margin.

step 15: take your second batting circle and put it in the back of your hoop. this helps the front of the finished piece to have the "puffy" look one usually sees in this type of embroidery

step 16: "slice" the margins of the fabric, just like you did with the back piece, trimming if you need to (i left my margin way too big so i had to trim all of them)

and fold them over the edge of the hoop and onto the batting, doing your best to keep the hoop edge as flat and smooth as possible.
step 17: once the glue is dry, pop the wrapped cardboard into the back of the hoop, fabric side up. this hides the yucky back part and makes it look "finished".

and now youre done!

the only thing left to do is hang it on the wall, or in my case, wrap it up and give it as a gift. (one of these days i promise im going to make one for us, i just can never get around to doing it).

so there you have it, my very first ever craft tutorial. maybe someday ill do more? well have to see about that.
No comments:
Post a Comment